
Reference
Guides
All 13 game modes and 213 chapters from the guide — step by step through every mod.
Game modes
 BedWarsDefend your bed and defeat the other teams.
 SkyWarsGather gear and hold your own on floating islands.
 DuelsHead-to-head duels where your skill decides.
 Survival GamesFind gear and survive to the very end.
 SkyBlockExpand your island and keep developing it.
 CityBuildBuild, design and create a place of your own.
 GetDownJump down, collect coins and win the fight.
 JumpDownThree shafts, one race: be the first one down.
 TTTFind the traitors before they find you.
 ArcadeBlock Party, TNT Run, Spleef and more — round after round.
 HousingFurnish your hotel room and meet new people.
 PracticeTrain fastbridge, clutch and MLG.
 Build serverBuild freely, become a builder, win contests.
 Welcome to LoraTechLoraTech brings big tech and magic mods to the server – nothing to install. All mods share the same materials: there is exactly one tin, one bronze, one copper wire.
The Recipe BookOpen it with /rezepte. Pick a mod at the top, turn pages at the bottom. Left-click an item: how to make it. Right-click: what it is used for.
 Ores and Where to Find ThemNew ores sit in stone like iron. Below y 0 they appear as deepslate ore. Tin Ore: common, y −24 to 72 Zinc Ore: common, y −16 to 80 Lead Ore: deep, y −56 to 40
 Metal FormsEvery metal comes in many forms: 9 nuggets = 1 ingot 9 ingots = 1 block 9 raw pieces = 1 raw block
 Hand ToolsHand tools stay in the grid while crafting and wear down. Shift-click crafts as much as possible. Forge Hammer: ingot → plate (160 uses)
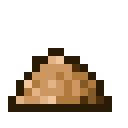 AlloysMix dust in the crafting table, then smelt it: Bronze: 3 copper + 1 tin = 4 Brass: 3 copper + 1 zinc = 4 Electrum: gold + silver = 2
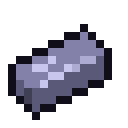 Special MaterialsRubber: smelt slimeballs or tap mod trees. Silicon Ingot: smelt quartz or silicon dust. Graphite: smelt coal dust. Carbon Fiber: 4 coal dust in a square.
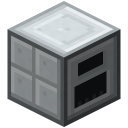 IndustrialCraft 2 – Getting StartedIndustrialCraft 2 brings electricity. Energy is measured in EU, power in EU/t. First goal: build a Treetap, tap Sticky Resin from a rubber tree and turn it into Rubber.
Rubber Trees and ResinRubber trees grow in forests, swamps and taiga (rarely in plains). Look for the narrow leaf spike on top and orange resin holes on the pale trunk (up to 3 per tree). Right-click a wet hole with the Treetap: 1–3 Sticky …
 Energy, Cables and VoltagePower travels in packets. Each tier has a maximum size: LV 32 · MV 128 · HV 512 · EV 2048 EU/t. Careful: a machine receiving a packet that is too big explodes. Basic machines are LV.
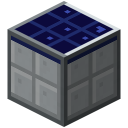 GeneratorsGenerator: 10 EU/t from fuel (coal 4000 EU, wood 750 EU). Geothermal Generator: 20 EU/t from lava (bucket or Lava Cell = 10,000 EU).
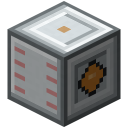 Storage and TransformersBatBox 40,000 EU (LV) · CESU 300,000 (MV) · MFE 4M (HV) · MFSU 40M (EV). The front (dots) outputs power, the other 5 sides accept it. The top slot charges tools, the bottom slot drains batteries.
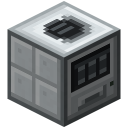 Basic MachinesAll machines: input top left, battery slot bottom left (RE battery or redstone = 800 EU), output right, 4 upgrade slots on the edge. Hover the arrow to see why a machine is idle. Macerator 2 EU/t, 15 s: ore or raw ore → …
 Ore Processing and SteelStep 1: ore/raw ore → Macerator → 2 crushed ore → furnace → ingots. Enough for the start. Step 2: crushed ore + 1000 mB water → Ore Washing Plant (16 EU/t) → purified ore + 2 tiny piles of dust + Stone Dust. Purified …
 UpgradesOverclocker Upgrade: each time ×0.7, usage ×1.6. Transformer Upgrade: +1 voltage tier (prevents explosions). Energy Storage Upgrade: +10,000 EU buffer. Ejector Upgrade / Pulling Upgrade: push items into / pull items …
 Mass Fabricator and UU-MatterThe Mass Fabricator (EV) turns 1,000,000 EU into one UU-Matter. Scrap as amplifier makes it up to 6× cheaper. Redstone = pause. UU-matter crafts into resources: e.g. 9 UU = diamond, 7 UU = iridium.
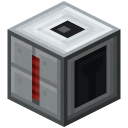 MinerThe Miner drills straight down with mining pipes and needs a drill (speed: mining < diamond < iridium). With an OD Scanner it mines ores in 7×7, with an OV Scanner in 13×13. Remove the drill = pipes return.
 Electric ToolsCharge in a BatBox/MFE or with a BatPack. Batteries: RE-Battery 10k, Energy Crystal 1M, Lapotron Crystal 10M. Mining Drill 50 EU/block, Diamond Drill 80, Iridium Drill 800 (sneak+right-click: Fortune III ↔ Silk Touch).
 Suits and PacksThe BatPack / LapPack charge held tools. Electric Jetpack: hold space = thrust, WASD steers (sprint = faster), sneak+right-click = hover mode (sneak = descend). More battery and speed: Advanced Jetpack (1M EU, charges …
 Nuclear ReactorNuclear Reactor + up to 6 chambers (each +1 column, +1000 hull). It runs only with a redstone signal — no signal = emergency stop (cooling continues). One reactor tick per second. While the reactor window is open, the …
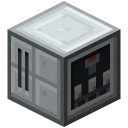 Canning Machine and PumpCanning Machine (4 EU/t): food + tin cans → filled cans (one can = 2 hunger, a steak = 4 cans) — food for the quantum helmet. It refuses spoiled food. Uranium Fuel + Fuel Rod (Empty) → Uranium Cell.
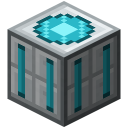 Teleporter and Construction FoamLink two teleporters: click A, then B with the Frequency Transmitter. With a redstone signal a player standing on top is sent to the partner. Cost: weight (armor, full stacks) × distance — an MFE nearby helps.
 Charge Pad, Elevator, Tesla CoilCharge pads come in all four storage tiers: Charge Pad (BatBox), Charge Pad (CESU), Charge Pad (MFE) and Charge Pad (MFSU) — storage like the BatBox & co., just with a pad on top. Stand on one: every electric item in …
 Progression1. Rubber, Iron Furnace, Generator, Macerator, BatBox 2. Extractor, Compressor, Electric Furnace, drills, solar 3. Metal Former, Ore Washing Plant, Advanced Alloy, Carbon Plate, MFE 4. Thermal Centrifuge, Nuclear …
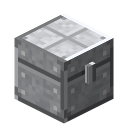 Storage – Getting StartedStorage combines four mods: Iron Chests (big chests), Storage Drawers (one item type in bulk), Ender Storage (colour-coded chests shared server-wide) and Sophisticated Backpacks (backpacks with upgrades). No power …
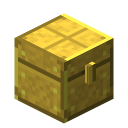 Metal ChestsSizes like the original: Copper 45 · Iron 54 · Gold 81 · Diamond 108 · Crystal 108 · Obsidian 108 · Netherite 135 slots. Above 54 slots use the arrows at the bottom. Sort: button in the bar or sneak-right-click with an …
 Chest UpgradesNo unpacking: right-click a placed chest with an upgrade — it becomes the next tier, contents stay. Wood→Copper and Wood→Iron work on normal (single) chests. Chain: copper → iron → gold → diamond → crystal or obsidian → …
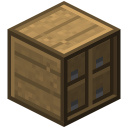 DrawersA drawer holds lots of one item type per slot: 1x1 = 32 stacks, 1x2 = 16 per slot, 2x2 = 8 per slot (half drawers: half). The front shows the item and the count.
 Drawer UpgradesEvery upgrade needs an Upgrade Template. 5 slots per drawer, right-click to install. Storage: obsidian ×2, iron ×4, gold ×8, diamond ×16, emerald ×32 — several add up.
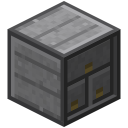 Compacting DrawerOne pool in three forms: block on top, ingot bottom-left, nugget bottom-right. Insert any form, take any form — conversion is automatic (9:1, glowstone/quartz 4:1). Works with all shared metals (tin, bronze …). …
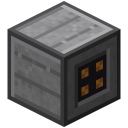 Drawer ControllerThe Drawer Controller turns all connected drawers (chain of drawers or trims, up to 12 blocks) into one inventory. Hoppers/pipes on the controller: items go to drawers of the same type first, then to empty ones.
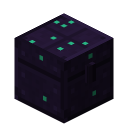 Ender ChestThree wool buttons on the lid = the frequency (16×16×16 options). Click a button with dye or wool to colour it. All ender chests with the same colours share their inventory — anywhere on the server.
 Ender Tank and PouchEnder Pouch: opens the ender chest of its frequency from anywhere. Use it on an ender chest to copy its colours. Ender Tank: 16,000 mB per frequency. Right-click the valve (empty hand): input (blue) or output (orange …
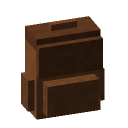 BackpacksTiers: leather 27 · copper 45 · iron 54 · gold 81 · diamond 108 · netherite 120 slots (1/1/2/3/5/7 upgrade slots). Right-click opens it. Wear it: put it in the chest slot, then sneak + F to open. Upgrading in the …
 Backpack UpgradesBase: Upgrade Base. Install via the upgrade button; "Settings" opens the filter (9 slots, allow/deny — just click items onto it). Pickup Upgrade, Magnet Upgrade (3 blocks), Void Upgrade.
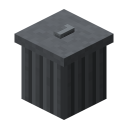 Trash CanThe Trash Can destroys items (pipes/hoppers instantly, in the window on close — until then you can change your mind), fluids and energy.
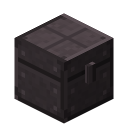 Progression1. Copper/iron chest to start, leather backpack on the go. 2. Drawer wall with a controller for farms, compacting drawer for ores. 3. Ender chests between base and farms, ender pouch on the go. 4. Diamond backpack with …
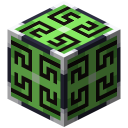
 AE2 – Getting StartedApplied Energistics 2 stores items digitally: an ME network of cables, drives and storage cells, used through terminals. Start with Certus Quartz Ore (underground, up to height 64). It drops certus quartz crystals …
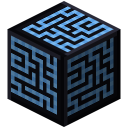 MeteoritesMeteorites leave big craters (30–40 blocks) full of gravel and rubble. A black ball of Sky Stone sits in the middle. Dig inside: the hollow core holds certus clusters, budding certus and the Mysterious Cube.
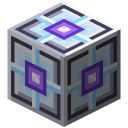 EnergyVibration Chamber: burns any furnace fuel, 5 AE per burn tick, 4–40 AE/t. Coal = 8,000 AE. It throttles when storage is full. Up to 3 cards: Energy Card (+50% AE per fuel) and Acceleration Card (+50% output, up to 100 …
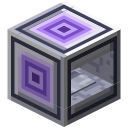 Inscriber & ProcessorsThe Inscriber has three slots: top, middle, bottom. Press on top + ingredient in the middle → printed circuit (the press stays). Silicon: smelt Certus Quartz Dust into silicon.
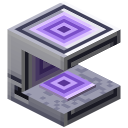 Charger & GrindstoneThe Charger charges Certus Quartz Crystal into Charged Certus Quartz Crystal (1,600 AE). Without power: put a Wooden Crank on top and turn it (10 turns). It also charges electric items like the Wireless Terminal.
 Fluix & Water TransformationsThrow Charged Certus Quartz Crystal, redstone and nether quartz into water together: you get 2 fluix crystals. Fluix is needed for cables, the controller and almost everything in the network.
 Growing CertusBudding certus grows buds on every free side like amethyst: small → medium → large → cluster. Mine a cluster with a pickaxe = 4 crystals (Fortune gives more). Unfinished buds only give 1 dust.
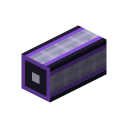 ME Network, Cables & ChannelsAll ME devices that touch or are connected by cables form one network. Cables: ME Glass Cable (Fluix) (from Quartz Fiber + fluix), covered, smart, dense. Normal cables and devices carry 8 channels, dense cables 32.
 Drive & Storage CellsThe ME Drive holds 10 cells. Cells 1k–256k have bytes and at most 63 types: each type costs bytes upfront, 8 items = 1 byte. 1k = 8,128 items of one kind, 4k = 32,512, 16k = 130,048, 64k = 520,192, 256k = 2,080,768.
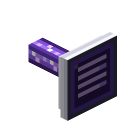 TerminalsThe ME Terminal shows everything in the network (like AE2). Left: stack, right: half, shift+left: to inventory, shift+right: one item (craftables: craft), Ctrl+Q: fill your inventory with it, number key: to hotbar. With …
 Buses & InterfaceBuses work on the block you place them against (clicked on a chest → on the chest; clicked on a cable → facing away from it, like the original). Rotate: wrench. ME Import Bus: pulls items in. ME Export Bus: pushes …
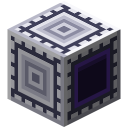 Autocrafting1. ME Pattern Encoding Terminal: put the recipe into the ghost fields (nothing is consumed), insert a Blank Pattern, "Encode". 2. Put the pattern into a ME Pattern Provider. Crafting patterns: a Molecular Assembler next …
 Progression1. Mine certus, find a meteorite. 2. Inscriber + charger, first processors. 3. Fluix, cables, energy. 4. Controller, drive, 1k cells, terminal. 5. Crafting terminal, buses, interface, wireless. 6. Autocrafting, 64k/256k …
 BuildCraft – Getting StartedBuildCraft is built on gears, engines and pipes. Everything starts with a Wooden Gear made of four sticks. Power is called MJ. Engines make it, wooden pipes and machines use it.
 GearsThe gear chain: Wooden Gear → Stone Gear (4 cobblestone) → Iron Gear (BuildCraft) (4 iron) → Gold Gear (BuildCraft) (4 gold) → Diamond Gear (4 diamonds). The shared Iron Gear and Gold Gear also work instead of the …
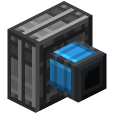 EnginesAll engines need a redstone signal (lever, torch, dust) – each its own: engines and machines don't pass redstone on. They only output power at their piston side. The trunk shows the heat: blue → green → yellow → red → …
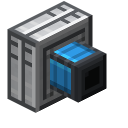 Combustion EngineCombustion Engine: oil 3 MJ/t (one bucket ≈ 4 min) or fuel 6 MJ/t (one bucket ≈ 21 min). Its heat rises with the output (faster in deserts). Above 100 °C it needs water, which keeps it at 100 °C – fuel ≈ 2 mB/t, oil ≈ 1 …
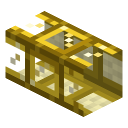 Transport PipesPipes: material – glass – material makes 8. Items glide visibly through them and pick a random free path at branches. No target? They flow back. The Wooden Transport Pipe extracts from chests and machines with engine …
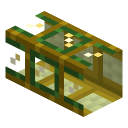 Fluid PipesTransport pipe + Pipe Sealant = fluid pipe. Throughput: cobblestone 10, stone/wood 20, quartz/iron 40, gold 80 mB/t. The Wooden Fluid Pipe extracts from tanks and machines with engine power. Iron Fluid Pipe has one …
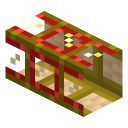 Kinesis PipesTransport pipe + redstone = kinesis pipe: carries MJ from engines to machines. Limits like BuildCraft 7.1: cobblestone 8, stone 16, wood 32, sandstone 32, quartz 64, gold 256, diamond 1,024 MJ/t.
 QuarryThe Quarry clears its area, builds a yellow-black frame and moves its drill layer by layer down to bedrock. Default: 9×9 behind the quarry. Cost: 20 + 20 × hardness MJ per block (stone 50 MJ) plus 2 MJ/t while the drill …
 Finding and Pumping OilYou can spot oil from far away: tall black spouts with oil running down and shiny black lakes around them. Most common in desert, badlands, taiga and ocean. Small oil lakes only appear in desert, badlands and taiga. …
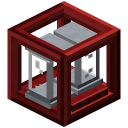 RefineryThe Refinery turns oil into fuel (1:1): 12 MJ per mB, at most 1 mB per tick – one bucket in 50 seconds at 12 MJ/t. Two combustion engines running on fuel give it full power. The magnets on the side pump faster the more …
 Building an Oil Base (step by step)1. Find a spout/oil lake, Pump above it, Redstone Engine on the pump, lever. 2. Next to the pump: tanks (stacked) – or fluid pipes to your base. 3. Power the Refinery: at first 2–4 Stirling engines or combustion engines …
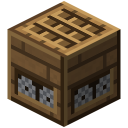 Auto WorkbenchSet a pattern in the Auto Workbench (click with an item, nothing is used up). Pipes or hoppers fill its storage, it crafts every half second. A wooden pipe takes the result.
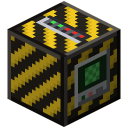 FillerThe Filler takes a land mark area (height via a mark on Y) and builds by pattern: fill, clear, box, walls, flatten, pyramid, stairs, cylinder (hollow). Blocks come from its storage. Like BuildCraft 7.1: 24 MJ per placed …
 Laser and Assembly TableThe Assembly Table needs no power itself – lasers within 4 blocks beam up to 4 MJ/t each into it. More lasers = faster. The beam colour shows the power: red up to 1, yellow up to 2, green up to 3, blue above 3 MJ/t; the …
 GatesInstall a Gate (made from a Redstone Chipset) into an item or fluid pipe with right-click. Sneak + empty hand opens it. If condition (redstone, pipe has contents, adjacent inventory/tank empty/full, engine hot) then …
Progression1. Wooden Gear → Redstone Engine → Wooden Transport Pipe 2. Stirling Engine + kinesis pipes 3. Quarry with land marks 4. Find oil (black spouts/lakes): Pump + Tank 5. Combustion Engine on oil + water cooling 6. Refinery …
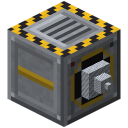 Quarry – Getting StartedThe Quarry digs a whole area layer by layer down to bedrock – automatically, even while you are away. You need: a Quarry, power (e.g. a Quarry Generator right next to it) and a chest touching the quarry.
 The Four TiersQuarry: 2 blocks/s, up to 16×16, 50 EU per block. Advanced Quarry: 5 blocks/s, up to 32×32, 45 EU. Elite Quarry: 10 blocks/s, up to 64×64, 40 EU. Ultimate Quarry: 20 blocks/s, up to 64×64, 35 EU. Cost rises with …
 LandmarksUse landmarks to pick your own rectangle: one landmark at the corner, one each in X and Z direction (same height, at most 64 blocks away). Right-click one to connect them (red lines). Then place the quarry right next to …
 ModulesModules go into the six slots in the GUI. Base: the Blank Module. Efficiency Module: +25% speed each (up to 4). Fortune Module: Fortune I–III (1–3 pieces), energy ×1.5/×2/×2.5. Silk Touch Module: blocks as themselves …
 Filter (Void)The Filter Module (Void) voids cobblestone, dirt, gravel, granite, diorite, andesite, tuff and netherrack so your chest doesn't overflow. Right-click with the module (or "Filter" in the quarry GUI): take an item on the …
 Pump & GeneratorWithout a Pump Module the quarry leaves water and lava alone. With it, sources go into two tanks (16,000 mB each), the rest is discarded. Tanks output to adjacent tanks. A Quarry Generator next to it burns the pumped …
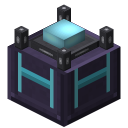 Laser DrillThe Laser Drill creates ores out of nothing – the world stays intact, ideal for spawn areas. It needs lots of power: 128 EU/t, 100 ticks per ore. The drill depth (GUI, default = its own height) sets the spread like the …
Protection & ChunksThe quarry only mines what you would be allowed to mine: for every block it asks protection plugins and your server's build rules. Protected blocks stay. While you're offline it only continues in columns that were …
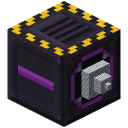 Progression1. Iron plates with the forge hammer, frame parts, Control Core → Quarry + Quarry Generator. 2. Filter Module (Void) and Efficiency Module. 3. Bronze plates + Diamond Drill Head → Advanced Quarry. 4. Electrum/invar + …
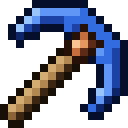 Materials and YouTinkers' Construct builds tools from parts. Every part has a material with its own stats and a trait. The head sets durability, speed, mining tier and attack, the handle multiplies them, the binding only adds its trait.
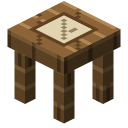 Part Builder & PatternsPattern (planks + sticks) on top, material below, pick a part, take it on the right. Material per unit: 1 plank, 1 stone/cobblestone, 1 flint, 1 bone, 1 Seared Brick or 1 slime ball (bindings only).
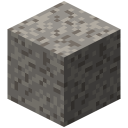 Grout & Seared StoneClay + sand + gravel make 2 Grout. Smelt grout into Seared Brick, 4 of them make Seared Bricks. Bricks build tanks, drains, faucets, the casting table and casting basin.
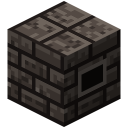 Melter & HeaterThe Seared Melter is the small starter smeltery: 3 slots, 12 ingot tank. Below it a Seared Heater with coal or wood (800 °C) or a Seared Fuel Tank with lava. Ores give only 1⅓ ingots here, 2 in the smeltery.
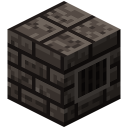 The SmelteryBuilding: a full floor of seared blocks, a ring of seared walls on top (corners optional), air inside, open top. The Smeltery Controller sits in the wall facing out. Inside 1×1 up to 14×14, up to 64 layers high. Every …
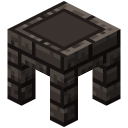 CastingFaucet above a Casting Table or Casting Basin. Right-click the faucet (or redstone) to pour exactly what is needed, then it cools. Basin without cast: blocks (810 mB). Table with cast: ingots, nuggets, gems, plates …
 AlloyingWhen the ingredients are together in the smeltery it alloys on its own (while burning): Bronze 3 copper + 1 tin → 4 · Rose gold copper + gold → 2 · Brass copper + zinc → 2 · Electrum gold + silver → 2 · Constantan …
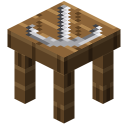 Building ToolsIn the Tinker Station pick the tool on top, insert the parts in the shown order, take it on the right. Small tools: Pickaxe, Mattock (shovel+axe), Hand Axe, Kama (harvest), Dagger, Sword.
 MaterialsWood/stone tier: wood (Cultivated), stone (Stonebound), flint (Jagged), bone (Piercing), slime (Overgrowth, binding only). Iron tier: copper (Dwarven), iron (Magnetic), seared stone (Searing), silver (Holy), lead …
ModifiersTool on the left in the station, ingredients next to it. Small tools: 3 upgrade + 1 ability slot, broad tools 2 + 1. Haste: 45 redstone per level (max 5) · Sharpness: 36 quartz per level (max 5) · Diamond +500 …
 Repairing & SwappingTinkers tools never break for good: at 0 durability they are broken and do nothing. Repair: tool + material of a head part (e.g. iron ingots) in the station. As many units as the head costs repair it fully. Repair Kit = …
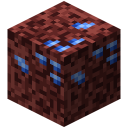 Cobalt & the NetherCobalt Ore lies deep in the Nether (diamond pickaxe needed). Cobalt melts at 950 °C, lava is enough. Manyullyn, hepatizon, queen's slime and netherite need Blazing Blood: melt blaze rods in the smeltery and put it into …
 Progression1. Wood/stone tools from the Part Builder 2. Grout → bricks → Melter 3. Cast the controller → Smeltery 4. Cast copper/iron/bronze parts 5. Alloys, Tinker's Anvil, broad tools 6. Cobalt, Blazing Blood, manyullyn & co. 7. …

 Thaumaturgy – Getting StartedThaumaturgy is magic made of aspects – the building blocks of all things. You need no power: strength comes from the world's vis. Underground you find infused stone. It yields vis shards.
 Aspects & ResearchWith the Thaumometer you scan blocks, creatures and items. Every first scan teaches aspects and grants research points. You only understand compound aspects once you know both parents.
 Crucible & AlchemySalis Mundus on a cauldron → Crucible. Add water, heat below (fire, lava, magma, Nitor). Thrown-in items dissolve into essentia (max 500, the rest becomes flux).
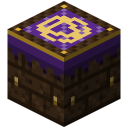 Arcane WorkbenchSalis Mundus on a crafting table → Arcane Workbench. Recipes cost vis (from the wand in the wand slot or from the aura) and often shards in the side slots.
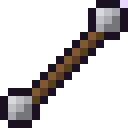 Wands & FociThe first wand holds 50 vis and recharges from the aura while held. Better caps (gold, thaumium) and cores (greatwood 150, silverwood 400) follow. Sneak + right-click the air: choose a focus.
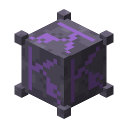 InfusionRunic Matrix two blocks above a Arcane Pedestal, four pillars of 2 Arcane Stone at the corners. Ingredients on pedestals, essentia in jars (up to 8 blocks). Wand on the matrix → infusion.
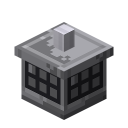 Aura & FluxEvery chunk holds vis that slowly recovers. Wasted magic becomes flux – too much brings flux clouds (nausea, weakness). Purge: Salis Mundus sneaking into the air or a Flux Scrubber. The Goggles of Revealing shows vis …
 Progression1. Shards → Salis Mundus → Thaumonomicon, Arcane Workbench, Crucible 2. Thaumometer, scanning, research table 3. Thaumium, nitor, first wand 4. Jars, alchemical furnace, foci 5. Infusion altar → elemental tools …
 Welcome to BotaniaBotania is tech with flowers. Almost everything happens visibly in the world: flowers produce mana, spreaders fire it as glowing bursts, pools store it, altars transform items. Your first goal: find Mystical Flowers and …
 Mystical Flowers16 Mystical Flowers grow in meadows, flower forests and forests. Breaking gives the flower; crafting turns it into 2 petals. No flowers nearby? Floral Fertilizer on grass grows 3–6 new ones.
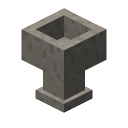 Petal ApothecaryThe Petal Apothecary is your key tool. Right-click with a water bucket to fill it. Throw in petals, runes and other ingredients — they float visibly. Finally throw a wheat seed: if the recipe matches, the flower pops …
 Pure DaisyThe Pure Daisy purifies the 8 blocks around it in 60 seconds: stone → livingrock, log → livingwood, netherrack → cobblestone, soul sand → sand, ice → packed ice → blue ice, water → snow, end stone → cobbled deepslate. …
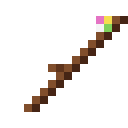 Wand of the ForestThe wand links everything. Bind mode: click a source (flower or spreader), then the target. Function mode: toggle pools (sneak), trigger altars and the elven gateway, rotate the Daffomill. Sneak + right-click air …
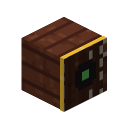 Mana SpreaderThe spreader collects mana (1,000) from flowers within 6 blocks and adjacent pools and fires 160-mana bursts at its target (max 32 blocks). One burst at a time. Redstone stops it; the redstone spreader fires on pulses …
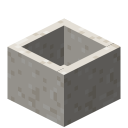 Mana PoolThe pool stores 1,000,000 mana (diluted: 10,000). Throw items onto it for mana infusion: iron → manasteel (3,000), ender pearl → mana pearl (6,000), diamond → mana diamond (10,000) and more.
 EndoflameEndoflame: Burns fuel items within 3 blocks: 1.5 mana/tick for half the furnace burn time.
 HydroangeasHydroangeas: Drinks adjacent water sources (infinite sources remain). Faster in rain. Decays after one hour.
 ThermalilyThermalily: Drinks adjacent lava: 20 mana/tick for 45 s, then cools down 20 s to 5 min.
 Rosa ArcanaRosa Arcana: Drains experience from players standing on it and XP orbs: 50 mana per point.
 GourmaryllisGourmaryllis: Eats food within 1 block. Mana = nutrition² × 70 — variety raises the multiplier up to 1.8.
 EntropinnyumEntropinnyum: Absorbs exploding TNT within 12 blocks (no block damage) for 6,500 mana — only when empty.
 KekimurusKekimurus: Eats a bite of cake every 4 s within 5 blocks: 1,800 mana.
 NarslimmusNarslimmus: Eats slimes naturally spawned in slime chunks (radius 2): 1,200 × 2^size mana.
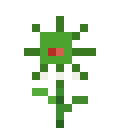 MunchdewMunchdew: Eats leaves within 8 blocks: 160 mana per block, then rests 80 s.
 Jaded AmaranthusJaded Amaranthus: Plants a random mystical flower within 4 blocks (100 mana).
 AgricarnationAgricarnation: Speeds up plants within 5 blocks (5 mana per pulse).
 HopperhockHopperhock: Collects items into adjacent inventories; item frames are filters.
 RannuncarpusRannuncarpus: Places block items onto blocks matching the one under its soil.
 ClayconiaClayconia: Turns sand within 5 blocks into clay balls (80 mana each).
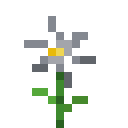 OrechidOrechid: Turns stone into ore every 5 s (17,500 mana), including the shared metal ores.
 Orechid IgnemOrechid Ignem: Like the Orechid, but netherrack → nether ores.
 BellethorneBellethorne: Damages all mobs except players within 6 blocks.
 ExoflameExoflame: Keeps furnaces within 5 blocks lit and cooks faster.
 PollidisiacPollidisiac: Feeds animals with dropped food so they breed.
 TangleberrieTangleberrie: Pulls mobs leaving its 6–7 block ring back.
 DaffomillDaffomill: Blows items 16 blocks forward; sneak + wand rotates it.
 Fallen KanadeFallen Kanade: Gives players and pets Regeneration III (120 mana).
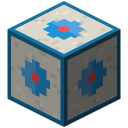 Mana FluxfieldThe Mana Fluxfield links Botania to the tech mods: aim a spreader at it, every mana becomes 2.5 EU (10 RF) and flows into cables and machines at up to 128 EU/tick.
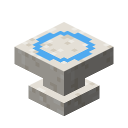 Runic AltarThrow ingredients onto the altar, aim a spreader at it (it only accepts mana with a valid recipe), then add livingrock and click with the wand. Runes used as ingredients are returned.
 TerrasteelThe Terra Plate sits on a 3×3 base (center and corners livingrock, edges lapis blocks). Throw a manasteel ingot, mana pearl and mana diamond on it; it draws 500,000 mana from pools within 5 blocks and forms terrasteel.
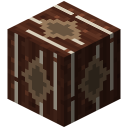 The Gateway to AlfheimBuild a vertical 5×5 frame: gateway core bottom center, livingwood sides, glimmering livingwood in the middle of each side, 3×3 air inside. Place 2 natura pylons on mana pools within 5 blocks. Wand on the core opens it …
 Tools & ArmorManasteel tools and armor repair themselves with mana from a tablet or mirror in your inventory. Elementium lasts longer; full terrasteel armor reduces mana costs by 20%.
Progression1. Flowers and apothecary 2. Pure Daisy 3. Wand, spreader, pool 4. Endoflame 5. Manasteel, pearl, diamond 6. Runic altar 7. Terrasteel 8. Alfheim 9. Equipment
 Lucky Block – Getting StartedA Lucky Block is a yellow block with a question mark. Break it = surprise: one of 170+ outcomes – diamond rain, pets, treasure chests … or TNT, cages and creepers. Craft: 8 gold ingots around a dispenser or dropper.
Luck −100 … +100Every Lucky Block has luck from −100 to +100 (lore with a bar). High luck = almost always good outcomes, bad luck = traps. Nothing is guaranteed! A placed block hides its luck – you can trick your friends.
 Colored and giant Lucky BlocksLucky Block + dye in a crafting table (luck stays): Green Lucky Block – nature Blue Lucky Block – tech Red Lucky Block – combat Purple Lucky Block – magic Rainbow Lucky Block – fun Their theme comes four times as often. …
 Lucky weapons and armorThe Lucky Sword (Lucky Block + golden sword) hits like diamond and about every 8th hit has a special power: arrow storm, life steal, lightning, frost, poison, double damage … with bad luck even weakness.
In the world: temples, wrecks, wellsNew chunks rarely hide Lucky Blocks (luck −20…+20). Even rarer: a quartz lucky temple with Lucky Blocks (+50…+100) – or a mossy wreck with netherrack (−50…−100). Careful!
 Lucky Block RaceThe Lucky Race Kit builds a race track: click air for 2–4 lanes, click the ground to build. Your Lucky Blocks from your inventory are spread evenly over the lanes (3+ per lane).
 Progression1. Craft Lucky Blocks and try them. 2. Raise luck with gold/diamonds. 3. Lucky sword, bow and potions. 4. Colored Lucky Blocks for your favorite theme. 5. Lucky armor (+40 luck). 6. Giant Lucky Blocks and the Lucky …
 Structures – Getting StartedStructures & Dungeons fills the world with 23 new places: taverns, watchtowers, castle ruins, dwarven mines, catacombs, pirate ships, pyramids – in the Nether and the End too. They only appear in newly explored land. …
 Maps & CompassSealed Map: right-click breaks the seal. It turns into a real treasure map with an X – to the nearest undiscovered structure of its kind (otherwise the nearest one). Found in chests and sold by the innkeeper (emeralds + …
Places on Land★ Tavern “The Golden Jug” – plains, forests, taigas. Innkeeper with maps, guest rooms, barrels of food. ★ Forest Cabin – a ranger's hut. ★ Windmill – plains, with field and millstone. ★ Stone Circle – druid stones …
Great Dungeons★★★ Castle Ruins – curtain wall, towers, keep; Robber Knight Kunibert waits in the dungeon. ★★★ Wizard Tower – alchemy, library with enchanting table, Archmage Morvan on top. ★★★ Ice Fortress – ice-spike towers, the …
By and in the Sea★★★ Pirate Ship “Black Gull” – deep oceans. Cannons, cargo hold, cabin with Captain Redbeard. ★ Shipwrecks (cog, broken galleon) – on the sea floor, guarded by drowned. ★★ Frozen Wreck – frozen into an ice floe. ★★ …
Nether & End★★★★ Ember Shrine – blackstone ruins in the Nether, ring of lava, soul fire. The Ember Lord hurls fireballs. ★★★★★ End Observatory – purpur ruins on the End highlands, shulker guards, the End Warden.
BossesBosses appear when you enter their arena. Their health bar shows on top. At 66 % and 33 % they change phase: minions, rage. More players = more health (up to +100 %). Flee and they retreat after 60 s – and return healed.
Treasure & TrapsThe treasure chest next to a boss stays locked until victory. Then everyone who fought gets their own loot – once per fight. Other chests are normal loot chests (by tier: simple, medium, rare, treasure) and often hold …
 RelicsCrown of the Bone King – night vision (Bone King). Pharaoh's Mask – Haste I (Pharaoh). Captain's Tricorne – water breathing + dolphin (Captain). Ember Heart – fire resistance in hand (Ember Lord).
Progression1. Loot small places (★): cabin, tower, mill, lighthouse, wrecks. 2. Find a tavern, buy maps, craft an Explorer's Compass. 3. ★★–★★★: graveyard, bandit camp, castle, wizard tower, dwarven mine, ship. 4. ★★★★: catacombs …
 Twilight Woods – Getting StartedThe Twilight Woods are a world of eternal dusk: fireflies, enchanted groves, mushroom forests, swamps, glaciers and a dark forest. Six bosses guard the lands. Only after defeating one may you enter the next — otherwise …
The PortalDig a 2×2 hole in grass or dirt and fill it with four water sources. Put flowers, grass, ferns, saplings or mushrooms on all 12 border tiles around it. Throw a diamond into the water. Lightning strikes and the pool …
 ProgressionOrder 1. Naga (Naga Courtyard) 2. Lich (Lich Tower) 3. Minotaur (Labyrinth in the swamp) 4. Hydra (Lair in the fire swamp) 5. Snow Queen (Glass Palace) 6. Ur-Ghast (Dark Tower) Afterwards the Highlands are yours.
 1. The NagaThe giant serpent lives in the Naga Courtyard, a hedge ring with pillars and nagastone paths. She winds up and charges — jump aside! Touching her body hurts. She can only be hurt while you stand inside the courtyard.
 2. The LichAt the top of the Lich Tower (ladder on the north wall). Phase 1: six golden shields — every hit breaks one, they regrow. Two shadows shoot along. Phase 2: Lich minions. Phase 3: melee, he leaps to you.
 3. The MinotaurThe Labyrinth lies below the swamp; a small stone hut with a ladder leads down. Corridors of Mazestone, chests in dead ends and three sealed vaults. The Minotaur charges straight. If he hits a wall he is stunned briefly …
 4. The HydraIn the Hydra Lair, a broken hill in the fire swamp. Three heads bite, breathe fire and shoot fireballs. Hit the heads (full damage); a smashed head falls and regrows after 15 s.
 5. The Snow QueenUp in the Glass Palace on the glacier. She floats and throws ice shards; four ice shields stop projectiles — melee breaks them. Phase 2: hail, ice beam and frost guardians.
 6. The Ur-GhastAtop the Dark Tower of Towerwood in the darklands. Fire volleys — blocks stay intact, you don't. While he weeps he is invulnerable, tears burn and ghastlings appear.
 Plants, Wood & CreaturesCanopy trees have trunks of Twilight Oak Log → Twilight Oak Planks → sticks, crafting table, chests, Towerwood. Twilight Oak Sapling grows into a canopy tree (bone meal helps). Root Wood underground gives sticks. …
 New Biomes – Getting Started57 new biomes (50 surface, 7 caves) appear in newly explored chunks. Existing areas stay unchanged and the terrain blends seamlessly. Every biome has its own grass, foliage, water, sky and fog colours, particles, music …
Atlas: ForestsMaple Woods Fiery red maple crowns over golden grass, leaf litter on the ground. Cool forest zones. Where: cool woodlands (instead of forest) Locate: lt_bi:ahornwald
Atlas: Meadows & FieldsLavender Fields Violet seas of lilac and allium to the horizon, birches with bees. Where: drier temperate plains Locate: lt_bi:lavendelfelder
Atlas: Cold LandsTundra Cold, snow-free plain: podzol, moss, spruce shrubs, berries and boulders. Where: snowy plains, medium humidity Locate: lt_bi:tundra
Atlas: Dry & HotSalt Flats Dazzling white salt crust, salt mounds and brine pools. Salt for cured meat! Where: flat, very dry desert Locate: lt_bi:salzpfanne
Atlas: Coast & SeaCoral Reef Crystal-clear turquoise shallows full of corals, sea pickles and tropical fish. Where: warm shallow ocean Locate: lt_bi:korallenriff
Atlas: CavesCrystal Cave Sparkling caves of blue and pink crystal, amethyst and calcite, crystal geodes. Where: caves below temperate dry land Locate: lt_bi:kristallhoehle
Atlas: SwampsLily Marsh Clear green marsh full of lily pads and blue orchids, moss cushions, reeds and fireflies at dusk. Where: temperate, humid swamps Locate: lt_bi:seerosensumpf
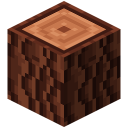
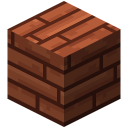 New WoodsRedwood Log (Redwood Forest), Glowwood Log (Glowing Forest) and Charred Log (Volcanic Land) give 4 planks each. Planks make crafting tables, chests and sticks. Logs smelt into charcoal.
 Salt & CuringSalt Crust drops 2 Salt. 4 salt = Salt Block, 4 salt blocks = 4 Salt Bricks. Salt + raw meat or fish = Cured Meat (very filling).
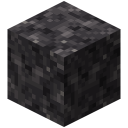 Volcano & AshVolcanic Ash fertilises: 1 ash = 3 bone meal. 4 ash = 2 Pumice. The Fire Blossom grows on basalt and gives Ember Dust (3 = blaze powder).
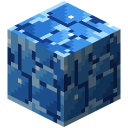 CrystalsBlue Crystal and Pink Crystal grow in crystal caves and crystal geodes. Mining gives 4 Crystal Shard; 2 shards = 1 amethyst shard.
 Special PlantsHarvest with right-click, they regrow (5 min): Fire Blossom (Volcanic Land), Salt Crystal (Salt Flats), Glowcap (Glowing Forest, Fungal Cave), Frost Lily (Glacier, Tundra). Breaking returns the plant for replanting.
 Equivalent Exchange – Getting StartedEquivalent Exchange (ProjectE) is alchemy: everything has a value in EMC. Cobblestone = 1, iron = 256, gold = 2,048, diamond = 8,192. First goal: the Philosopher's Stone (redstone, glowstone dust, diamond).
Philosopher's StoneRight-click a block to transmute it: stone↔cobble, dirt↔grass, gravel↔sandstone, water→ice, lava→obsidian, melon↔pumpkin, cycle woods, leaves, saplings, planks and wool colors. Sneak = other direction.
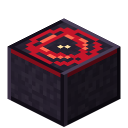 Transmutation TableThe Transmutation Table belongs to YOU: balance and knowledge work at every table and every Transmutation Tablet. Put an item into the fire (bottom left): it burns, you get its EMC value and learn it.
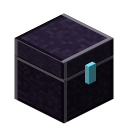 Energy CondenserThe heart of EE: click a target item into the top-left slot (you keep it). Everything else in the Energy Condenser burns to EMC and becomes the target — exactly by value. MK1: 20 items/s. Energy Condenser MK2: whole …
 Collectors & RelaysEnergy Collector MK1 gather light as EMC: MK1 4/s, MK2 12/s, MK3 40/s at light 15 (always full in the Nether). Storage 10,000 / 30,000 / 60,000. Fuel on the left is upgraded tier by tier (charcoal → … → aeternalis …
 Klein StarsPortable EMC storage: Ein 50,000, Zwei 200,000, Drei 800,000, Vier 3.2M, Sphere 12.8M, Omega 51.2M. 4 empty stars make the next tier. Rings, catalyst and watch draw EMC from stars in your inventory (otherwise from fuel).
 Dark & Red MatterDark Matter = 8 aeternalis fuel + diamond block (139,264 EMC). Red Matter = 6 aeternalis + 3 dark matter (466,944 EMC). Blocks from 4 pieces; DM blocks need a DM pickaxe, RM blocks an RM pickaxe.
 Matter ToolsUnbreakable and faster than netherite. F = mode, sneak + right-click = charge. Dark Matter Pickaxe: single / 3×3 / tunnel / tall / wide, right-click an ore to mine the whole vein. Dark Matter Hammer: charge 1×1 / 3×3 / …
 Rings & ArtifactsEverything starts with the Iron Band. Rings work in the hotbar or off-hand, right-click = on/off. Black Hole Band attracts items (in the Alchemical Chest: sucks them in). Swiftwolf's Rending Gale: flight (costs EMC), no …
 Progression1. Philosopher's Stone → 2. Transmutation Table → 3. Condenser + Collectors → 4. Dark Matter → 5. Red Matter → 6. Rings and Tools.
 Mystical AgricultureGrow resources instead of mining them! Everything starts with two base materials: Inferium Essence – from Inferium Ore (Y −32 to 64) and a 20 % drop from every mob you kill. Prosperity Shard – from Prosperity Ore (Y −60 …
 Essence TiersSix tiers: Inferium → Prudentium → Tertium → Imperium → Supremium → Insanium. In a crafting grid 4 essence + Infusion Crystal make 1 essence of the next tier. The crystal stays and lasts 1000 uses.
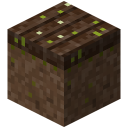 FarmlandMystical crops grow on any farmland, but essence farmland pays off: • 10 % chance for a second seed and a second essence • +10 % when farmland and seed tier match • Inferium Seeds drop +50 % essence per farmland tier …
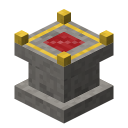 Infusion AltarResource seeds are made at the Infusion Altar. Place 8 Infusion Pedestal at the same height around it: 3 blocks straight (N, E, S, W) and 2+2 diagonally. If a pedestal is missing, the altar shows glowing spots.
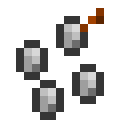 Resource SeedsOver 70 crops in six tiers, e.g.: Tier 1 Stone, Dirt, Wood, Ice, Air, Water, Fire Tier 2 Coal, Nature, Nether, Dye, Amethyst, Aluminum Tier 3 Iron, Copper, Redstone, Quartz, Glowstone, Obsidian, Tin, Silver, Lead
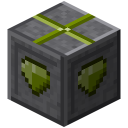 Speeding Up GrowthInferium Growth Accelerator go below the farmland. Every 10 s each accelerator gives the crop above a growth boost. They stack: Range Inferium 9, Prudentium 18, Tertium 27, Imperium 36, Supremium 45, Insanium 54 blocks.
 Mob Seeds & Soul JarsIn the Nether you find Soulstone with Soulium Ore. Soulstone in a furnace → Soul Dust → Soul Glass. Carry Soul Jars and kill mobs with the Soulium Dagger: every kill adds a soul.
 Essence GearEvery piece: 2 tier gemstones + 2 tier ingots + the piece of the previous tier (Inferium: diamond piece). Enchantments carry over. Tools: sword, pickaxe, shovel, axe, hoe, sickle (harvests around), shears. Supremium is …
 AugmentsAugments give essence gear an ability. Made in the Infusion Altar: middle Blank Augment, pedestals 4× ingredient + 4× tier essence. Insert and remove them at the Tinkering Table: gear on the left, augment on the right. …
 Insanium & CruxInsanium is tier 6 (4 Supremium + crystal). Nether Star and Dragon Egg crops only grow with a crux two blocks below the crop (below the farmland). Harvest: Nether Star Shard (3 = 1 Nether Star), Dragon Egg Chunk (3 = 1 …
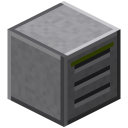 Harvester & ReprocessorThe Harvester harvests one ripe crop every 2 seconds in the 5×5 field in front, replants it and puts the harvest into the chest behind it. The Seed Reprocessor turns 1 spare seed into 2 essence (hoppers in/out).
 Progression1. Collect Inferium + Prosperity 2. Plant Inferium Seeds 3. Infusion Crystal 4. Essence farmland 5. Infusion Altar → first seeds (iron, coal …) 6. Accelerators & watering can 7. Soul jars → mob seeds 8. Gear up to …

 Draconic Evolution – Getting StartedDraconic Evolution is the endgame mod: Draconium becomes cores, cores become machines and finally gear with an energy shield and flight. Energy is shown in RF (1 EU = 4 RF) and flows through the cables of all mods. …
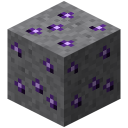 DraconiumDraconium Ore is very rare in the overworld and lies deep down (also as Deepslate Draconium Ore). The Nether has more (Nether Draconium Ore), the End the most (End Draconium Ore). Needs a diamond pickaxe. Each ore drops …
 CoresAlmost everything needs cores: Draconium Core → Wyvern Core (with a Nether Star) → Awakened Core (fusion) → Chaotic Core (fusion). Energy components: Wyvern Energy Core and Draconic Energy Core.
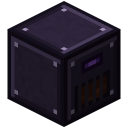 Draconic GeneratorThe Draconic Generator burns furnace fuel (coal, wood, blaze rods, coal blocks …) and outputs RF on all sides. Modes (GUI button): Eco 40 RF/t (150 % yield), Normal 90 RF/t, Performance 180 RF/t (80 %), Performance+ 360 …
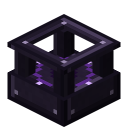 Energy InfuserThe Energy Infuser charges any electric item — Draconic tools and armor as well as items of other mods. Up to 100,000 RF/t, 1M RF buffer. Hoppers/pipes may insert items and only pull them out once they are full.
 Fusion CraftingThe heart of the mod: the Fusion Crafting Core with injectors around it. Injectors stand 2–16 blocks away from the core with their front facing the core (look at the core when placing). Each direction holds a 3×3 lane …
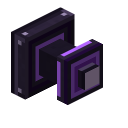 Injector TiersEvery recipe has a tier; all used injectors need at least that tier. Basic Fusion Crafting Injector (10k RF/t) → Wyvern Fusion Crafting Injector (100k) → Draconic Fusion Crafting Injector (1M) → Chaotic Fusion Crafting …
 Wyvern GearWyvern tools (Wyvern Pickaxe, Wyvern Shovel, Wyvern Axe) mine 3×3, 80 RF per block. Sneak + right-click switches 1×1/3×3. Chests, furnaces and tech blocks stay, land protection applies to every block. The Wyvern Sword …
 Flux CapacitorsA Wyvern Flux Capacitor (64M RF) or Draconic Flux Capacitor (256M RF) is a portable battery. Right-click turns it on — then it charges your worn armor and held items from your inventory (also electric items of other …
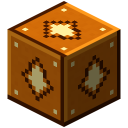 Awakened DraconiumFusion with Wyvern injectors: 4 Draconium Block in the core, 6 Draconium Core and one Dragon Heart in the injectors → 4 Awakened Draconium Block. This costs a lot of energy — an Energy Core as a buffer pays off.
 Draconic GearWyvern pieces are upgraded to Draconic by fusion (Draconic injectors) — charge, enchantments and settings are kept. Tools up to 5×5 and depth 2, armor with a double shield (176), real flight, water breathing, step …
 Energy CoreThe Energy Core stores huge amounts: tier 1 = 45.5M RF … tier 7 = 2.14 trillion RF, tier 8 = practically infinite. Spherical shells go around the core: tier 2 = 6 Draconium Block, tier 3 = 26, from tier 4 redstone …
 Energy CrystalsCrystals transfer energy without cables. Click a crystal with the Crystal Binder (select), then the next one (link, again = unlink). The Energy I/O Crystal sits at machines/cables: sneak + right-click = input (grid → …
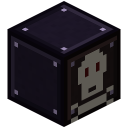 Mob GrinderThe Mob Grinder kills mobs in a 9×9×9 area in front of it (at most 2 per second) for 1,000 RF + 40 RF per health point. Never players, no tamed, leashed or named animals, no villagers. If the owner is online it counts …
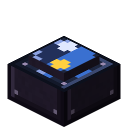 Celestial ManipulatorThe Celestial Manipulator turns time for energy (sunrise, noon, sunset, moonrise, midnight, moonset, skip a day) or changes the weather. Shift-click picks the action for a redstone signal.
 DislocatorsDislocator: sneak + right-click binds the location once, right-click teleports (also to other worlds), 21 jumps, each costs one heart. Advanced Dislocator: 18 destinations, ender pearls as fuel (1 per jump). Item …
 Mob Soul & SpawnerDraconic swords make mobs rarely drop a Mob Soul. Stabilized spawner: right-click a spawner with a Draconium Core (tier 1), then Wyvern Core, Awakened Core, Chaotic Core — 4/6/8/12 mobs, faster each time. A mob soul …
 ChaosChaos Shard drop from the second Ender Dragon of a world on. With them (fusion, Draconic injectors): Chaotic Core → Chaotic Fusion Crafting Injector (with a dragon egg) → Chaotic gear: 7×7, depth 3, shield 352.
 Draconic ReactorSetup: Draconic Reactor Core, 4 Reactor Stabilizer in one plane (2–8 blocks) and one Reactor Energy Injector on the free axis. Fuel: Awakened Draconium (right-click, max 8 blocks). Charge: the injector needs energy …
 Progression1. Draconium (the End!) → Draconium Core → Draconic Generator 2. Fusion Crafting Core + Basic Fusion Crafting Injector → Wyvern Fusion Crafting Injector 3. Wyvern Core → Wyvern gear + Energy Infuser 4. Dragon → Dragon …